Sunday, 6 February 2011

The Red Scarf

I've been waiting until the light is good enough so I can finish off taking pictures of the red scarf. I have waited a week, and this has not happened, so I can going to post what pictures I have got. Lesson: next sunny day, take pictures of anything that I have knitted or crocheted to provide content for this blog, or else I'll have to crack out a few more salt marsh pictures.

Anyway, the red scarf is the first thing I have made from New England Knits. I didn't knit it from the book verbatim, instead, I stole the leaf lace panels from the Ashfield Cardigan and made them into a scarf. It has a six stitch 1x1 rib at each edge, and then I just worked the panels as charted in the pattern next to each other, presenting a branching effect. Rather than make a full length scarf, I decided to make it a third of normal length and finish off with buttons. I am especially enamoured with this length of scarf at the moment, as you can button up the scarf to fit your neck and then slip the loose end round your neck to double up the warmth, or display the loose end down your front. The real advantage of this length of scarf is that you can slip it in the pocket of a coat, without ending up with huge bulges from the balled up scarf.

DSCF2523

I particularly love the buttons on this scarf. I bought them in the summer from a little craft shop in Minehead which, despite its unassuming exterior, always seems to have a couple of seriously beautiful buttons. I thought that I had lost them some time between purchase and returning home from Somerset, but I found them a few weeks ago - just in time for my 'RED' project, which they suit perfectly.

DSCF2516

The RED is from Wollmeise Sockenwolle 80/20 in shade 'Vamp'. It is very red - described as Ferrari red, and indeed, a colour that is so bright that it is difficult to find a suitable project for it. In the end, I decided that mini-scarfs are the best way to show off the yarn - a little flash of colour in a full outfit. It also lets me get best use out of the yarn - 'Red Scarf' is the second mini-scarf that I've made from the skein.

This post is also about the wonders of blocking. I don't think I've ever really appreciated blocking - I have always been very tentative with my blocking, using lukewarm water and barely letting the project touch the water before extracting it, scared that prolonged exposure to water would mean that my project lost all its colour/felted/would never get dry. This time however, I used fairly hot water and pushed the yarn down until it was all wet so that no bubbles came out. Well, the result was wonderful. It went from having a fairly scrunched up look, as below:
DSCF2511
To the lovely flat example in the previous picture, which I took straight after blocking. As soon as there is good light, I will endeavour to take a picture of the completely finished project!

Also, just on a blog note. Thank you Rebekah from Michigan for alerting me that the comments didn't work. I'm sorry that I hadn't realised that there was a problem. I've done some fiddling, and hopefully it is now fixed!

Friday, 28 January 2011

What I'm meant to be doing

What I'm meant to be doing is writing my dissertation about the salt industry. As the photo below from the summer depicts, a salt evaporation pond in Guérande, France.

DSCF2147

But the internet is more exciting, and the dissertation is daunting. So I am not.

Still waiting for nice sun. There was good sun today, but I was out over the middle of the day, so I couldn't take advantage of it.

Wednesday, 26 January 2011

Waiting...

For a day that isn't overcast so I can photograph my projects in decent light. My camera is small and needs lots of help. January days are not providing such help.


I have at least 1 pattern waiting for good light so I can take a picture of it. And another that I could publish, but I am currently on the fence about it. Some things work very well. But the main component...it's just a bit ugly.

In the mean time, I'm meant to be writing my dissertation for uni. Creating patterns is much more exciting. I'm currently considering whether I would be able to make my regular hook into a Tunisian hook by sellotaping a straw to the end of it.

I haven't made a decision about the cardigan. I ordered three different colours of Malabrigo, but now they're here, none of them really fit what I'm looking for. I want something slightly semi-solid, that comes on long skeins, won't pill lots and possibly doesn't involve winding (although I managed to wind a ball without any problems last week, so perhaps I am getting better). Basically, an affordable UK version of Madelinetosh. I have weird dreams where I escape to academia in America (or Toronto) just so I can buy all the exciting American yarns without having to pay customs duty. Hmm...it doesn't look like it's happening soon (mainly because I've been a wimp and not applied to non-UK Masters courses), I'll have to remind myself that I'm lucky to have Rowan, Debbie Bliss, EasyKnits and Wollmeise easily accessible.


Wednesday, 12 January 2011

Knitting a Cardigan

Ever since I started crocheting, creating the perfect garment has been the goal. With crochet, I think that the closest I have come to that, is with the Esmée Cardigan - but the jury is still out, I need to make up an Esmée for me rather than a tiny model before I can say that I've come close to achieving that far off goal.


Since I've started knitting therefore (if not before), making a cardigan has been the goal. I started small - with hats, scarves, gloves - projects where the end point is close so that the end didn't lose interest. However, I now think that I am ready to knit a cardigan, and am enjoying the fun (and frustrating) part of choosing a pattern, yarn and colour.

To cast the net wide, my first thought was that I ought to start with a proven pattern. Something that lots of people have made, that the photos on ravelry show suiting different body types (especially the chesty ones like me). A February Lady Sweater, perhaps, or a tea leaves cardigan, or an Amelia, or maybe an Ysolda Teague design - Liesl or a Coraline. Patterns which you only need to know the name to be able to picture them in your mind. None of them really captured my imagination.

Then I bought knitscene, and the general guilt about having to make something from a book that I had bought crept in. The essayist pullover is closest to what I would buy, but having made Knotty with ribbed cuffs, I wasn't sure if I could cope with making a whole ribbed garment. The loose simplicity of the Carrot cardigan also appealed, but the idea of knitting row upon row of stockinette makes me feel slightly comatose.

Then for Christmas, I asked for (and received) New England Knits, full of gorgeous sweater and cardigan pattners (and photography). Perused and pored upon for several days, I've finally decided that the Fairfield sweater is the pattern for me.


© Interweave

It's close enough in design to my favourite cardigan that I know that it will suit me, but also has some design interest to suggest it's not something I would be able to buy in a shop.

Now the problem is yarn. The asked for yarn is Classic Elite Kumara - a merino and camel mix. Unavailable in UK, and I don't want to pay customs charges so I won't be ordering it from US. Quince & Co Osprey is also suggested -also unavailable in UK - this is a 100% wool yarn, so it gives me ideas for substitution. I want a mainly wool substitute in aran or worsted weight. I'll need about 1300m, and ideally, I want to pay under £60. Any ideas?

At the moment, I'm thinking either Coldharbour Mill Aran - I love the story behind it, the skeins are large which is good for end-weaving. But the colours I can buy online are not really inspiring me, and if I do choose this route, then I'll probably have to buy direct from the mill. The alternative that I'm considering, is to use Malabrigo Worsted - a yarn beloved by many, also in large skeins but I'm worried that the single ply will equal much pilling. I've yet to find a shade that I love in a UK online yarn store so I'm still looking. If price were no option, I'd love to make it in Blacker Yarn's Pure Shetland Fawn Aran, but considering all the ends I'd have to weave in with a 60m skein, I don't think that it's worth it. I'm going to keep looking, and hoping that I stumble upon the right yarn!

Monday, 10 January 2011

Knotty Gloves, and Wollmeise

You may have noticed that photos of my gloves have a particular photographic style. And that the Idony gloves were published at the same time of year as the Skaði gloves. The photographic style is due to my brother being around at Christmas, and he is someone who actually knows how to operate a camera, rather than my 'point and shoot at someone with a pretty background'. The time of year is because the Idony gloves were a present for my Mum. I've reach the curious point in my crocheting adventures where I feel guilt if I follow a pattern. Something like fingerless gloves are so simple that I ought to be able to devise a pattern for them myself, rather than follow someone else's design. There are, however, a few fingerless glove designs that I intend to try once I get over this feeling of guilt - especially Aoibhe Ni Shuilleabhain's Dragon Skin Gaunlets (these also fall into the other area of crafting guilt - that I ought to be making things from the magazines that I own, last year's subscription to Inside Crochet means that I now have a whole magazine box full of patterns I have not made).


Anyway, back to Knotty. These were a gift to me. By me. I had bought a Wollmeise We're Different Sockenwolle 80/20 pack on a whim and in the heady rush of 'trying to get something Wollmeise before they all run out', in turquoise. With these packs, you aren't told which colours you are getting, just the colour family they fall in. These are also the yarns which have acted as guinea pigs, tests or don't quite match what they are meant to be. They are sold slightly cheaper than the basic colours, but you can't control which colours (aside from the colour family) that you get. I like Wollmeise - for the colour saturation, the length, the smell (I don't know what the smell is, but it's not at all sheepy) and that it is produced in Germany, meaning I can have it shipped to the UK without having to pay custom dues (what has put me off buying the Sanguine Gryphon's yarns). I ended up with two guinea pig yarns, variations on Vergissmeinnicht (Forget-me-not), which became Knotty and the Idony Gloves and Pfefferminz Prinz (which is variegated turquoise and green).

So I had some Wollmeise, but as with many rash yarn purchases, I didn't really have a pattern in mind. Thanks to Ravelry's pattern ideas function, I was able to look through what others had made and eventually settled upon Knotty.

DSC_0281-Edit

Which is a pair of knitted gloves, which a large cable on the front. Much more advanced than anything I had tried before. I had done cables on the Brambles beret, but not to the extent that are on Knotty, and I had never dropped stitches and then picked them up again. However, undaunted, I bought myself some Addi circulars in the right size and started.

The cuffs were too big. I wanted to cry. Instead, I started again, casting on 52 stitches instead of sixty. This time they worked. When I got to the cable, I worked it on the first thirty stitches. I changed the size of the fingers to fit in with the smaller number of stitches (picked up 8sts front and back for index finger (16 total), 6 for middle and ring finger (12 total each) and remaining 12 for pinky). I think this probably meant that there were larger holes at the bottom of the fingers, but I filled these in with the waste yarn from joining on at the bottom. And more importantly, they fit and I didn't have to buy another needle!

DSC_0283-Edit
I have waited to post until I've worn the gloves out and about for a bit. I still like them, they still hold up, they are warm. I'm not going to put them away in a cupboard. The only probably is the ends that had to be woven in - some of them are beginning to pop out.

A few months before buying the We're Different pack from Wollmeise, I had bought a single skein of Vamp. Vamp is red. Bright, unquestionably red. I hadn't known what to do with it. I'd tried crocheting a bolero, but that hadn't really worked. But this Christmas, I knitted up a lace mini-scarf with it for a friend. Then for Christmas, I received New England Knits, a beautiful book. I'm now making another scarf based on the lace panels from the Ashfield Cardigan. I will endeavour to photograph it properly and post it here. And I'm planning a big project...to knit a cardigan. But I think that deserves its own post.

Friday, 24 December 2010

Idony Fingerless Gloves

Idony Fingerless Gloves

A simple stitch pattern makes the most of stunning yarn, and provides a great fit!

DSC_0271-Edit

Notions:

50g (about 170yd/155m) of Wollmeise Sockenwolle 80/20 Twin in shade Vergissmeinicht (14wpi), or another sock or fingering yarn

3.5mm (E) hook

About 60 beads

Needle for weaving in ends

Special stitches:

Crossed double crochet (crdc): Skip one stitch, double crochet in next stitch. Go back to skipped stitch, and double crochet in that stitch. Explained in more detail here.

Pattern:

Ch 30, sl to form ring

Row 1: 30 sc around

Row 2: Ch 3, 30 crdc around

Rows 3-9: 30 sc around

Row 10: Ch 3, 30 crdc around

Rows 11-2: 30 sc around.

Row 13: 2sc in first st, (place marker in 1st sc) sc 2sc in next stitch (marker in 2nd sc), sc around

Row 14-5: 2sc in markers and 1sc in rest on next two rounds so that have 7sts between markers

Row 16: Sc around

Row 17: 2sc in markers, sc in other stitches

Repeat rows 16-7 until have 15 sts between markers

Row 26 and continue until body of glove (above last crdc round) measures approximately 3 in.: Sc around

Thumb division: At first stitch marker, ch 4 and rejoin 13 sts along

Row 2-3(after thumb division): Sc around body of glove 2 rounds

Row 4: 3ch, crdc around (add bead to each dc if wish).

Row 5: Sc around once. Bind off

Thumb: Join next to first chain on palm of glove.

Row 1: Sc around until reach chain – sc2tog twice (15sts)

Row 2: Sc around until reach previous sc2tog – sc2tog (14sts)

Row 3- end: Sc around until reaches desired length. Bind off.

Repeat for second glove.

Tips:

If you want to add beads, and don’t want to thread them onto the yarn at the beginning of the project, then do the crdc round and sc round, then cut yarn, rip back and add beads and redo crdc round and sc round.

DSC_0276-Edit

Friday, 3 December 2010

Esmee Cardigan, Inside Crochet and Tiny Hats

I've been somewhat overwhelmed with work this term, and the idea of blogging about my crafting has become something of an alien concept. However, I think this is a crafting event that definitely needs documenting.


cover
Photo from Inside Crochet, KALMedia on Yudu

That, the Esmée Cardigan on the cover of Inside Crochet magazine, is my cardigan. The cardigan that I designed, made, and wrote the pattern for, and the first design that I submitted for publication.

The Esmée cardigan began with Lila, at the beginning of 2009. I had attempted to make Annette Pétavy's Leaves sweater from the Crochet Me! book, but lack of swatching meant that I made it hideously too large. Annoyed, I went in search of other 4-ply crochet patterns, eventually, (well, probably not after very long as they're in the same book) Robyn Chachula's Comfy Cardi. However, I found the instructions for the arm a little difficult to understand, but found the stitch pattern to be quite beautiful. Really, I just wanted a lacy cardigan, with some shaping that took account of the fact that I have breasts and a waist. A quick drawing ended up with something very similar to what I ended up submitting with the Esmée cardigan (this is what I submitted with Esmée):

drawing
Some kind of lacy pattern, v-neck, waistband/differentiation/cinching. I worked out how many repeats of the 'lacy diamonds' pattern from the Comfy Cardy I would need for my measurements, and off I went. And produced this:
DSCF1318
While the measurements were right, the placing of the armholes were not - the back was too large, making the v-neck all skewed, the shoulders falling down the arms. It just didn't quite work. But my Mum liked it, and asked me to make one similar for her.

The idea of making an identical Lila (or Mila - Lila for Mum, as I christened it) sounded rather boring, and so I went in search of an interesting stitch pattern that might at least vary the experience. I ended up choosing the 'Gilded fans' stitch pattern from the Crochet Vogue Stitchionary. And by the beginning of June, I had created this:
DSCF1806
That didn't quite work either - but that's more through blunders rather than design fault. The back fits perfectly, as do the sleeves, but I placed the waist band much too low, drawing attention to the widest point and being utterly unflattering. I also knew that if I was to make the cardigan again, then I would have to choose a stitch pattern that worked well with the decreases required by the v-neck, as well as being slightly easier to work in the round (ish - backwards and forwards creating a fairly seamless look rather than strictly 'in the round') for the sleeves. Gilded fans was a bit of a nightmare.

So when Inside Crochet sent out a call for patterns, I knew that if I was going to send in a garment then it would have to be something that I was familiar with. And though Lila and Mila had both been imperfect, they had received compliments on the design (v-neck, lace, waistband) and so I decided to go for it. A happy night practising different stitch patterns, and trying to come up with a lace that was visually interesting (like the 'lacy diamonds' on Lila) without being overpowering (which the 'gilded fans' on Mila has a tendency to be). I ended up thinking about leaves, and my love of dc2tog (US terms) and the diamond stitch pattern of Esmée was created.

Proposal was submitted, accepted. Yarn came in early summer, stitching began in earnest in July as I tried to organise crochet around helping on a kid's camp and going to Brittany for dissertation research. Struggled with the whole idea of making something 'sample size' (size 10, I am not). Finally, when I had just finished it, found someone of 'sample size' build to try it on for me. Lovely, although I must mention that on her, it fell to the 'well-fitted' end of the spectrum (rather than flowy), which I think I was aiming for but if you want something flowing and for layering, then it may be worth making a size larger (or definitely swatching and checking before you make).

Chose buttons. Being back at the kids' camp and without much computer access, wrote pattern out by hand. Wished I'd made more notes. Cursed choosing to do a v-neck. Drew numerous stitch diagrams to try and work out how it all worked. Finished. Typed up at home. Made stitch diagrams on computer - much respect for people who draw all their stitch diagrams on the computer. Thought up various blurbs. Thought of name. Thought about name more. Decided on name - Esmée - memorable of Esmeralda or the green colour, French as much of it was stitched in France, feminine.

Sent off at the beginning of September. Waited. Waited. Waited.

And then saw this:
inside
Photo from Inside Crochet, KALMedia on Yudu
Ah. Happy.

In the meantime, I have been crafting. Quite a lot of knitting - made four green hats, of which two are still existing (two frogged to make the other two). Practised lace knitting. Started knitting gloves.
Made nine (lost one) tiny hats for my friend to use as decorations for a Christmas dinner she ran, in this picture, the ones that I made are in the two rows on the right (the rest are from Innocent Smoothie bottles):

DSCF2359
Four are crocheted (top right, both on 2nd row to bottom, and bottom left of the 2 columns), and the rest were knit. I used the knitted ones to practise some techniques - ribbing (top left), colourwork (2nd row) and Christmas pudding making (bottom right). The one that I lost was white and I had practised cables on.

My favourite is the yellow one:
DSCF2360
It's done in Tunisian crochet, worked flat with two rows of decreases and then sewed together.

The top photo also shows the Granny Square blanket I've been making. It's currently 5x5 squares, intended to use up stash.

Sunday, 11 July 2010

Wisley and Dover Castle

I hope photos of knitting and crocheting will come soon. I am paused with the knitting - it has reached the length where I have to decide whether I want to stop and make a buttoned cowl, or if I keep going and make a proper scarf. I have worked out the lace pattern, I am no longer making mistakes and I am confident that I could complete a scarf. But I have yarn coming, hopefully this week, for a big crochet project, so it would be good to finish the knitting before that comes.
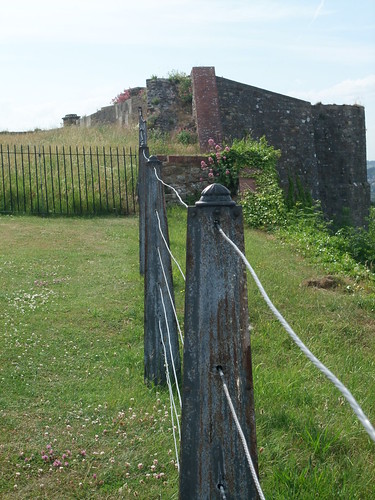

In the meantime, here are some photos from Dover Castle, which we visited last weekend, and Wisley, which we visited yesterday. As you can see, I rather like the macro function on my camera, and having things in focus in the foreground with an interesting background. Oh, and not taking photographs of castles.

Dover Castle:


DSCF2016

DSCF2061

Wisley:

DSCF2130

DSCF2136

DSCF2123

DSCF2111

Monday, 14 June 2010

Crochet fashion and crochet patterns

Apparently, crochet is cool. At least, in the fickle world of fashion, it is getting a little more exposure than usual. Aside from my suspicion that a lot of clothes advertised as 'crochet' are not actually crocheted, and the concern about how if they are actually crocheted, how low the pay of the crocheters must be to produce a garment that sells for less than £30 as I am aware of the rudimentary mantra that 'crochet cannot be made by machine'. I am not going to go on such a rant, although be sure I will mention it to my friends if I notice them making crocheted clothes (after examining them to work out the stitch pattern), instead I am going to look at which patterns are available that conform to current shop-bought patterns, but have the satisfaction of being able to say 'I made it!'.


I haven't made any of these patterns myself, so cannot guarantee their quality during the creation process, I am only commenting on similarities with current fashions. All pattern links go to Ravelry.

Tanks are apparently big. See Topshop. Lots of openwork, as can be seen on Ananaskuvioinen toppi or Sawayaka Cotton Motif Vest or Doris Chan's Lapa or the Uzuri Summer Top.


Many tops are incorporating a crochet edging, and so Berroco's Nell top, or Laura Nelkin's Summer Duet, or the Upcycled Tee from Crochet Today!, or the Floral Motif Yoke Top from Crochet Adorned seem appropriate.

Asos has various crocheted waistcoats. The American term is apparently 'vest' rather than 'waistcoat' and Ravelry is abounds with them, as well as the possibility of leaving off the sleeves of a cardigan pattern. The following are my favourite: Crocheted Openwork Vest, Robyn Chachula's Gladiolus Vest, and three patterns by DROPS.

Just a few buyable objects I've spotted that are reminiscent of a certain pattern (though that does not mean that there are other patterns that will not suffice as well!). This necklace featured in ELLE reminds me of this garter from Interweave Crochet. This headband from Topshop reminds me of the JuJu hairbands from Inside Crochet. This skirt by Oscar de la Renta reminds me of the amazing work done by Antonina.

I suppose I'll end this post with Interweave Crochet. The preview for the summer issue came out today, and there are several patterns within it that made me gasp. They may just be channelling my current love of lace and greeny-blue colours, but I love the Peaseblossom tunic, delicate Moth Wings shrug, the Mirth sweater and Puck tunic.

I'm also looking forward to going home next week, as the latest issue of Inside Crochet should have arrived. I think the Time for Tea set is adorable, and am interested about the stitch pattern of the Marabella capelet and Picnic wrap.

With all that crochet talk, I suppose it may be a surprise that I have been knitting this week. Truth be told, I just finished Mila - a version of Lila for my Mother, which took about 5 weeks of crocheting through revision and exams. I suddenly have free time to learn something and get to grips with a new skill so I am attempting lace knitting. But knitting makes me impatient, I long for the quick results of crochet, and so a long scarf pattern is becoming a small button-up cowl.

I will post about Mila soon, once I've given it to my Mum, and the days brighten up a little so decent photos can be taken! I'm intending to wear my small Seraphina shawl to a formal event tomorrow, so hopefully will get better photos of it than I did at Christmas!

Sunday, 23 May 2010

Heidi Shawl


A flexible shawl, suitable for snuggling up on a cold winter's day, or covering the arms in the summer.
DSCF1745The example in the pictures was made under time-pressure, so acts as a small capelet or scarf, with the button anchoring the shawl in place. However, the pattern is expandable so that a larger shawl can be made, it could also act as a bolero if you sew up the underarms.
DSCF1794
The shawl is made up of a dense stitch pattern at the top of the shawl, changing into a wider mesh pattern about halfway down.
DSCF1779


The shawl can be worn with the button fastened at the top, making it a capelet, or more casually, with the button fastening into the fabric of the shawl.

DSCF1769

Or with the fabric twisted and fastened by the button.

DSCF1723

Heidi Shawl Pattern
Notions:

About 1 skein to 2 skeins of madelinetosh tosh DK in Jade (11wpi, 206 metres per skein). Pictured example used 1 skein.

5mm hook

Button

Needle to weave in ends and attach button


Pattern (uses US terms):

Special stitches:

Dc2tog: yarn over, insert in stitch, yarn over, pull over first loop, yarn over, pull through 2 loops on hook, yarn over, insert in next stitch, yarn over, pull over first loop, yarn over, pull through 2 loops on hook, yarn over, pull through all 3 loops on stitch.

The 3 ch at beginning of each round are counted as 1 stitch, as is each subsequent chain in pattern (so 3ch ch1 dc dc ch1 dc would be counted as 6 stitches). Chains in the first half of the pattern are counted as increases and should be stitched into in the next row (look at the loops from the previous row, not the stitches).

There are charts below the pattern for anyone who gets lost!

Dense pattern:

Row 1: magic loop, work 12 sc onto loop, and pull closed. Put finger in centre of loop so that it does not shut completely.

Row 2: 2 dc into first 6 stitches, turn leaving rest of stitches unworked (12 stitches)

Row 3: 3 ch, *ch1, dc into next 2 stitches*, repeat *to* 4 times, ch1, dc into last stitch, turn (18 stitches)

Row 4: 3 ch, *ch1, dc2tog, 2dc in chain space*, repeat *to* 4 times, ch 1, dc into last stitch, turn (23 stitches)

Row 5: 3 ch *ch1, dc into next 4 stitches*, repeat *to* 4 times, ch 1, dc into last stitch, turn (28 stitches)

Row 6: 3 ch, *ch1, dc, dc2tog, dc, 2dc in chain space* repeat *to* 4 times, ch 1, dc into last stitch, turn (33 stitches)

Row 7: 3ch, *ch1, dc in next 6 stitches*, repeat *to* 4 times, ch 1, dc into last stitch, turn (38 stitches)

Row 8: 3 ch, *ch1, dc in next 2 stitches, dc2tog, dc in next 2 stitches, 2dc in chain space* repeat *to* 4 times, ch 1, dc into last stitch, turn (43 stitches)

Row 9: 3 ch, *ch1, dc in next 8 stitches*, repeat *to* 4 times, ch 1, dc into last stitch, turn (48 stitches)

Row 10: 3ch, *ch1, dc in next 3 stitches, dc2tog, dc in next 3 stitches, 2dc in chain space*, *to* 4 times, ch 1, dc into last stitch, turn (53 stitches)

Continue this pattern of increases as long as desired, so that:

Even row: 3ch *ch1, dc in next (even number) stitches*, repeat *to* 4 times, ch1, dc into last stitch, turn (number8 stitches)

Odd row: 3 ch *ch1, dc in next (number of dcs in last odd row +1) stitches, dc2tog, dc in next (number of dcs in last odd row +1), 2dc in chain space*, repeat *to* 4 times, ch1, dc into last stitch, turn (number3 stitches)

Mesh pattern:

Row 1 (should come after an even row): 4ch,*dc, ch over next stitch* repeat *to* until reach ch space, 2dc in chain space, ch1, repeat this pattern until reach end. Do not do 2ch in final chain space but ch1 and then 1dc in last stitch, turn

Row 2: 4ch, *dc in top of previous row's dc, ch over previous row's chain* repeat *to* until reach previous row's 2dc increase – dc in first dc, ch1 and place marker over this stitch, dc in second dc, ch1, continue *to*, repeat until reach end, ch1, dc in last stitch, turn

Row 3: 4ch, *dc in top of previous row's dc, ch over previous row's chain* repeat *to* until reach marker placed in previous row – remove and 2dc in ch space, ch1, continue *to* and increases until reach end, ch1, dc in last stitch, turn.

Repeat rows 2 and 3 until desired length. There should be 4 places where increases are occurring.

Weave in ends. Sew button at the bottom of the dense pattern, or wherever is convenient for neck width.
Charts:

This chart shows the *to* units of the dense pattern. The arrows show the direction of working.

Photobucket

This chart shows the changeover from the dense pattern to the mesh pattern.

Photobucket

 
Template by suckmylolly.com