Sunday, 11 July 2010

Wisley and Dover Castle

I hope photos of knitting and crocheting will come soon. I am paused with the knitting - it has reached the length where I have to decide whether I want to stop and make a buttoned cowl, or if I keep going and make a proper scarf. I have worked out the lace pattern, I am no longer making mistakes and I am confident that I could complete a scarf. But I have yarn coming, hopefully this week, for a big crochet project, so it would be good to finish the knitting before that comes.


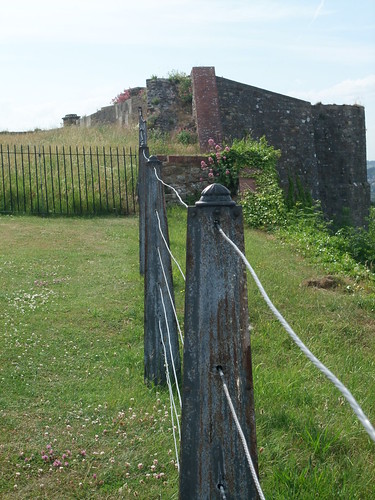
In the meantime, here are some photos from Dover Castle, which we visited last weekend, and Wisley, which we visited yesterday. As you can see, I rather like the macro function on my camera, and having things in focus in the foreground with an interesting background. Oh, and not taking photographs of castles.

Dover Castle:


DSCF2016

DSCF2061

Wisley:

DSCF2130

DSCF2136

DSCF2123

DSCF2111

Monday, 14 June 2010

Crochet fashion and crochet patterns

Apparently, crochet is cool. At least, in the fickle world of fashion, it is getting a little more exposure than usual. Aside from my suspicion that a lot of clothes advertised as 'crochet' are not actually crocheted, and the concern about how if they are actually crocheted, how low the pay of the crocheters must be to produce a garment that sells for less than £30 as I am aware of the rudimentary mantra that 'crochet cannot be made by machine'. I am not going to go on such a rant, although be sure I will mention it to my friends if I notice them making crocheted clothes (after examining them to work out the stitch pattern), instead I am going to look at which patterns are available that conform to current shop-bought patterns, but have the satisfaction of being able to say 'I made it!'.


I haven't made any of these patterns myself, so cannot guarantee their quality during the creation process, I am only commenting on similarities with current fashions. All pattern links go to Ravelry.

Tanks are apparently big. See Topshop. Lots of openwork, as can be seen on Ananaskuvioinen toppi or Sawayaka Cotton Motif Vest or Doris Chan's Lapa or the Uzuri Summer Top.


Many tops are incorporating a crochet edging, and so Berroco's Nell top, or Laura Nelkin's Summer Duet, or the Upcycled Tee from Crochet Today!, or the Floral Motif Yoke Top from Crochet Adorned seem appropriate.

Asos has various crocheted waistcoats. The American term is apparently 'vest' rather than 'waistcoat' and Ravelry is abounds with them, as well as the possibility of leaving off the sleeves of a cardigan pattern. The following are my favourite: Crocheted Openwork Vest, Robyn Chachula's Gladiolus Vest, and three patterns by DROPS.

Just a few buyable objects I've spotted that are reminiscent of a certain pattern (though that does not mean that there are other patterns that will not suffice as well!). This necklace featured in ELLE reminds me of this garter from Interweave Crochet. This headband from Topshop reminds me of the JuJu hairbands from Inside Crochet. This skirt by Oscar de la Renta reminds me of the amazing work done by Antonina.

I suppose I'll end this post with Interweave Crochet. The preview for the summer issue came out today, and there are several patterns within it that made me gasp. They may just be channelling my current love of lace and greeny-blue colours, but I love the Peaseblossom tunic, delicate Moth Wings shrug, the Mirth sweater and Puck tunic.

I'm also looking forward to going home next week, as the latest issue of Inside Crochet should have arrived. I think the Time for Tea set is adorable, and am interested about the stitch pattern of the Marabella capelet and Picnic wrap.

With all that crochet talk, I suppose it may be a surprise that I have been knitting this week. Truth be told, I just finished Mila - a version of Lila for my Mother, which took about 5 weeks of crocheting through revision and exams. I suddenly have free time to learn something and get to grips with a new skill so I am attempting lace knitting. But knitting makes me impatient, I long for the quick results of crochet, and so a long scarf pattern is becoming a small button-up cowl.

I will post about Mila soon, once I've given it to my Mum, and the days brighten up a little so decent photos can be taken! I'm intending to wear my small Seraphina shawl to a formal event tomorrow, so hopefully will get better photos of it than I did at Christmas!

Sunday, 23 May 2010

Heidi Shawl


A flexible shawl, suitable for snuggling up on a cold winter's day, or covering the arms in the summer.
DSCF1745The example in the pictures was made under time-pressure, so acts as a small capelet or scarf, with the button anchoring the shawl in place. However, the pattern is expandable so that a larger shawl can be made, it could also act as a bolero if you sew up the underarms.
DSCF1794
The shawl is made up of a dense stitch pattern at the top of the shawl, changing into a wider mesh pattern about halfway down.
DSCF1779


The shawl can be worn with the button fastened at the top, making it a capelet, or more casually, with the button fastening into the fabric of the shawl.

DSCF1769

Or with the fabric twisted and fastened by the button.

DSCF1723

Heidi Shawl Pattern
Notions:

About 1 skein to 2 skeins of madelinetosh tosh DK in Jade (11wpi, 206 metres per skein). Pictured example used 1 skein.

5mm hook

Button

Needle to weave in ends and attach button


Pattern (uses US terms):

Special stitches:

Dc2tog: yarn over, insert in stitch, yarn over, pull over first loop, yarn over, pull through 2 loops on hook, yarn over, insert in next stitch, yarn over, pull over first loop, yarn over, pull through 2 loops on hook, yarn over, pull through all 3 loops on stitch.

The 3 ch at beginning of each round are counted as 1 stitch, as is each subsequent chain in pattern (so 3ch ch1 dc dc ch1 dc would be counted as 6 stitches). Chains in the first half of the pattern are counted as increases and should be stitched into in the next row (look at the loops from the previous row, not the stitches).

There are charts below the pattern for anyone who gets lost!

Dense pattern:

Row 1: magic loop, work 12 sc onto loop, and pull closed. Put finger in centre of loop so that it does not shut completely.

Row 2: 2 dc into first 6 stitches, turn leaving rest of stitches unworked (12 stitches)

Row 3: 3 ch, *ch1, dc into next 2 stitches*, repeat *to* 4 times, ch1, dc into last stitch, turn (18 stitches)

Row 4: 3 ch, *ch1, dc2tog, 2dc in chain space*, repeat *to* 4 times, ch 1, dc into last stitch, turn (23 stitches)

Row 5: 3 ch *ch1, dc into next 4 stitches*, repeat *to* 4 times, ch 1, dc into last stitch, turn (28 stitches)

Row 6: 3 ch, *ch1, dc, dc2tog, dc, 2dc in chain space* repeat *to* 4 times, ch 1, dc into last stitch, turn (33 stitches)

Row 7: 3ch, *ch1, dc in next 6 stitches*, repeat *to* 4 times, ch 1, dc into last stitch, turn (38 stitches)

Row 8: 3 ch, *ch1, dc in next 2 stitches, dc2tog, dc in next 2 stitches, 2dc in chain space* repeat *to* 4 times, ch 1, dc into last stitch, turn (43 stitches)

Row 9: 3 ch, *ch1, dc in next 8 stitches*, repeat *to* 4 times, ch 1, dc into last stitch, turn (48 stitches)

Row 10: 3ch, *ch1, dc in next 3 stitches, dc2tog, dc in next 3 stitches, 2dc in chain space*, *to* 4 times, ch 1, dc into last stitch, turn (53 stitches)

Continue this pattern of increases as long as desired, so that:

Even row: 3ch *ch1, dc in next (even number) stitches*, repeat *to* 4 times, ch1, dc into last stitch, turn (number8 stitches)

Odd row: 3 ch *ch1, dc in next (number of dcs in last odd row +1) stitches, dc2tog, dc in next (number of dcs in last odd row +1), 2dc in chain space*, repeat *to* 4 times, ch1, dc into last stitch, turn (number3 stitches)

Mesh pattern:

Row 1 (should come after an even row): 4ch,*dc, ch over next stitch* repeat *to* until reach ch space, 2dc in chain space, ch1, repeat this pattern until reach end. Do not do 2ch in final chain space but ch1 and then 1dc in last stitch, turn

Row 2: 4ch, *dc in top of previous row's dc, ch over previous row's chain* repeat *to* until reach previous row's 2dc increase – dc in first dc, ch1 and place marker over this stitch, dc in second dc, ch1, continue *to*, repeat until reach end, ch1, dc in last stitch, turn

Row 3: 4ch, *dc in top of previous row's dc, ch over previous row's chain* repeat *to* until reach marker placed in previous row – remove and 2dc in ch space, ch1, continue *to* and increases until reach end, ch1, dc in last stitch, turn.

Repeat rows 2 and 3 until desired length. There should be 4 places where increases are occurring.

Weave in ends. Sew button at the bottom of the dense pattern, or wherever is convenient for neck width.
Charts:

This chart shows the *to* units of the dense pattern. The arrows show the direction of working.

Photobucket

This chart shows the changeover from the dense pattern to the mesh pattern.

Photobucket

Sunday, 25 April 2010

The problem...

with buying pretty yarn off the internet in hanks is that I have to hand-wind it. Which is fine. Except currently I have no compulsion to do so. I could wind the lovely Madelinetosh in Jade, which is for my half-finished Road to Bruges scarf, or I could wind the luscious EasyKnits' semi-solids in Midnight and start the birthday Lila that my Mother has commissioned. They'll both be lovely to crochet, I'm sure. It's just the thought of winding that is prompting me into procrastination :(


DSCF1597

Thursday, 1 April 2010

Adirondack Socks

DSCF1433

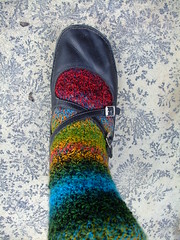
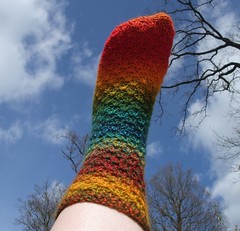
If you can't tell by that picture, I am seriously in love with these socks. Or at least, I seriously enjoyed making these socks. It's a combination of lovely wool, interesting pattern and a sunny day.

I will start with the wool. It was much anticipated and initially somewhat disappointing, but crocheting with it was heaven. Much anticipated because I ordered it from USA (along with special Madelinetosh for Mum's Mother's Day present), and ordered it to college not home. It did not take three weeks to arrive, it took longer - I went home for the holidays, expecting to pick it up when I returned in the middle of April. Then college forwarded the customs charges for the package. Ah. Forgot about that. Mild panic as I thought that I would be unable to get to the post office in college town to pay. Then realised I could pay online. Thought nothing of it. Then the package arrived at home - I love college for forwarding it.

I thought I had ordered Schoppel Wolle Zauberball 1564 not Crazy Zauberball. So my immediate thought on opening the package was slight disappointment. This was not pure rainbows. This was 2 ply of rainbows, mixed together to make some lovely colours (see green, red, orange on left foot below) and other combinations that I am not so fond of (see the black mixes on the right foot below). I'm not sure what happened, but the online order was for Crazy Zauberball, so it seems like I was the one to make the mistake. Hmph.


However, crocheting with the yarn removed my misgivings. Oh so lovely and soft (my last project was with mercerised cotton, this wool-nylon was a blessed relief). And watching colours change is fascinating, especially at the end of left sock where it all became like a rainbow rather than a mix. So warm as well, to wear. Home is freezy at the moment and I've been wearing them all day and its kept my toes rather toasty.


Onto the pattern. Adirondack Socks by Patsy Harbor. I keep spelling Adirondack wrong. In my head, they are Rainbow socks because I can actually spell that. A quick explanation of what I think a good pattern consists of: easy to follow, good results, teaches something new. This pattern did all of that. In bucket loads. Very easy to follow, I ripped back once, and that was only because I had made right sock a little short to ensure that I had enough yarn for left sock. When I found that I had plenty left over from the second sock, then I ripped back the end of first sock and made it a little longer. So that ripping back was not the pattern's fault, but due to my own conservativeness. Teaches something new - this pattern actually taught me three new stitches - extended single crochet, back-post double crochet (that was really a duh! moment, seeing as I couldn't work out how front and back were different until watching a youtube video), and foundation double crochet - which I hadn't got round to learning through my own laziness. I made the middle size as I was using a 3mm hook (that was the only 3-- mm size that I could find in my special crochet hook tin), and had no problems.


Sunny day is somewhat self-explanatory. It's been raining for the past week, which meant that there wasn't enough light to adequately photograph my first ever pair of socks (not quite as pretty as these). I certainly took advantage of the sun, lying on the patio with my legs in the air to get these photos, and then pretending to take pictures of flowers when my neighbour came out her back door.

Apologies for not posting since December. I was making the mega-cardigan Lila, which I have yet to photograph, then a series of gifts for other people that were gone before photos could be taken.

Wednesday, 23 December 2009

Skaði Fingerless Gloves

Skaði is the Norse goddess and giantess associated with skiing, mountains and winter. These fingerless gloves are a snug choice for winter, using moss stitch to create a dense yet stretchy fabric.
IMG_564811
Notions:
1 skein of Palette Vintage Worsted yarn (9 wpi) in Enamel
5mm (H) hook
Needle to weave in ends
Pattern:
Uses US crochet terms
Cuffs:
Ch 25
Row 1: Single crochet around back-loops only. Slip stitch to first stitch, turn.
Row 2-9: Repeat as above. This should form back-loop only ribbing.
Hand portion:
Row 10: Moss stitch around (switch to crocheting in the round). Moss stitch = *1 single crochet into both loops, chain over next stitch* repeat *to*
Row 11 onwards: * **Sc into chain space, ch over sc**, every 5 **to** inc by 1 (sc ch sc ch in 1 ch space)* repeat *to* 10 times
After: *Moss stitch around inc by 1 every 10 sts* repeat *to* 3 times
After: *Moss stitch around (no increases)* until the moss stitch fabric above the cuff measure around 2 inches.
Thumb hole: ch1, slip stitch into 7 moss sts before (14 loops – sc ch). Moss stitch around until measures 1 inch. Slip stitch and bind off.
Rest of hand: reattach at bottom edge of thumb hole. Moss stitch around until measures 2 inches from thumb divide.
Edging: *slip stitch in first loop, double crochet in next loop* repeat *to* until reach beginning. Slip stitch, bind off.
Weave in all ends.
IMG_56365

Thursday, 19 November 2009

Rapunzel again and the joy of having a finished object

Rapunzel has lain dormant in my cupboard since it was finished during the summer. It is now November. The problem was the sleeves. I tried to pull them up so that I would have something on my shoulders, which meant they were too tight, and fell down anyway. I thought the only way to fix it would be to rip the seams and make the shoulder part larger. Well, a few days ago, inspired by another Rapunzel FO, I decided it was time to pull my own Rapunzel out the cupboard and wear it to a lecture. Instead of trying to pull it into the shape Rapunzel is meant to be, with a U shape neck, I decided to wear it as a boat neck, with the sleeves falling off the shoulder. Perhaps it was months hanging up in the cupboard, but the sleeves fitted! Hooray! I realised that I didn't have to rip the seams at all, I could just add extra panels to make it fit the U neck that I wanted. So that's what I did, sewed up the seams on the arms which were quite loose, and then blocked it (wet blocked because I don't have a clue about blocking, so just dunked it in the sink and then pinned it to a towel). The sleeves were looser, it isn't a weird shape at the the top and it is so snug and cosy for winter, hurrah!


DSCF1214
It's not quite Rapunzel as it is meant to be, but it works. And I've been working on two huge projects (Zany by Robyn Chachula and the unnamed cardigan of strange yokes) so has missed the satisfaction that comes with something actually being finished *happy sigh*

DSCF1204

Thursday, 29 October 2009

Now which hook was I using...

Had a very exciting arrival of a lot of Mirasol Cotanani (as well as more Sirdar Peru for the dyeing experiments), which I am making into a yoked cardigan. The problem? I started the yoke, ran out of yarn, put it down with hook. Hook became unattached. I have now picked it up a week later and am trying to work out which hook I was using! I'm making it up as I go along, so don't have a handy pattern to check from. At the moment, I think I was using a 4.5mm - I remember thinking that the hook was smaller than last time I made a yoked cardigan...but I'm not sure. I've been working on various projects with a 5mm hook this week, so the 4.5 feels weird in my hands. I've worked and reworked the same row with different sized hooks, but I honestly cannot see a difference between the 4.5mm and 5mm...so am going with my instinct!


Now some yarn:
This one is mainly black cherry kool-aid, with the end of ghoul-aid mixed in. There is some variation between the pinks, but it's a little too late to take pictures so the nuances don't quite show up.

DSCF1131

Sunday, 18 October 2009

Kool-Aid Dyeing

With a huge 'wet room' bathroom, and half a skein of Sirdar Peru in a neutral colour, I decided to hava go at dyeing. I ordered a 'dye equipment kit' from the internet as well as various different colours of 'Kool-Aid'. I chose 'Ghoul-Aid' for my first attempt, made one sachet up into a bottle (haven't a clue if that's the right proportions!) and then used a large syringe to squirt half of it onto the yarn, which had been soaked in lukewarm water for half an hour.


This done, I took a smaller box, filled it with water and suspended it over my larger box, then zapped it in the microwave. I was very tentative, and didn't get steam, but the water was hot and the water coming from the yarn was clear, so I decided it was dyed! Let it cool down for twenty minutes, and then sponged off excess water with newspaper. Washed with soap and rinsed in sink, then hung up to dry, which it is doing at the moment...so I await results!

DSCF1115
The drying contraption! I didn't have anything in my bathroom to hang it up with, so put up my music stand and then suspended a coat hanger from it, and then attached a coathanger with the yarn on it to one side, and a weighted coat hanger to the other side. It seems to have worked!


DSCF1121

The yarn - it isn't a bold colour, more of an antique rose - but is still very different from the starting colour! I do like it - I was rather shocked when the dye came out as dark blue in the bottle!

Sunday, 20 September 2009

Londesborough Hat Pattern

*This is my first pattern, any problems, mistakes or difficulties you find with the pattern, please do not hesitate to ask or inform me*

This hat is inspired by the 8-9th century Irish Londesborough brooch. The hat comes up fairly large, so see the end of the pattern for some suggestions to make it smaller. The spirals are not an integral part of the hat, and do not have to be incorporated if not wanted.

DSCF1039

NOTIONS:

1.5 skeins of Rowan Tapestry (approx. 180m/195yds) – this is a DK/8ply yarn, comes in 50g skeins

4.5mm and 3mm hook

Tapestry needle for weaving in ends

Pins (at least 5)

GAUGE:

Hdc: 4x4 in – 9 rowsx15sts

PATTERN:

With 4.5mm hook

Ch 3

Rnd 1: sc 7 in ring

2: *2sc in first sc, 1sc in next sc* repeat around (14 sts)

3: *2sc in first sc, 1 sc in next 2 sc* repeat around (21 sts)

4: *2sc in first sc, 1 sc in next 3 sc* repeat around (28 sts)

5: *2sc in first sc, 1 sc in next 4 sc* repeat around (35 sts)

6: *2sc in first sc, 1 sc in next 5 sc* repeat around (42 sts)

7: *2sc in first sc, 1 sc in next 6 sc* repeat around (49 sts)

8: *2sc in first sc, 1 sc in next 7 sc* repeat around (56 sts)

9: *2sc in first sc, 1 sc in next 8 sc* repeat around (63 sts)

10: *2sc in first sc, 1 sc in next 9 sc* repeat around (70 sts)

11: Use stitch markers to divide circle into three sections. Put stitch marker at beginning, at 23 sts and 46 sts (dividing into 23, 23, 22).

Section 1: From stitch marker, 5 sc in ea stitch, turn

Row 2-18: Ch1, 5 sc, turn

Bind off

Repeat for section 2 and 3, but do not bind off after section 3

Hat should look something like this:

Photobucket

Ch 25 from section 3 to 2, 5 sc in bottom of section 2, ch 25 from 2 to 1, 5 sc, ch 25 from 1 to 3, sc 25. Bind off.

Like so:

Photobucket

In panel A:

Row 1: 25 hdc in ea ch across, sl in edge, turn

2-5: 25 hdc in back 2 loops of ea hdc across, sl in edge, turn

6: extra sl in edge, 25 dc in ea hdc across, sl in edge, turn

7: hdc2tog, 23 hdc, sl in edge, turn (24 sts)

8: hdc2tog, 22 hdc, sl in edge, turn (23 sts)

9-17: 23 hdc in ea hdc across, sl in edge, turn

18: turn to wrong side, sl together edge of centre circle and panel A, bind off

Repeat for panels B & C

Spiral:

Take 3mm hook, attach to panel A, 3 hdc down from top, 7 hdc in from left hand side, ch 50, attach other end to 3 hdc up from dc line, 7 hdc in from right hand side.

Pin into spiral shape

Diagram:

Photobucket

Picture:

DSCF1094

Sc 50 along spiral and into back fabric, bind off

Repeat for panel B & C

Suggestions for making a smaller size:

Add a band at the bottom of the hat, *hdc2tog, hdc in next 4 sts* around, sc when reaching each 5sc section.

OR

Rnd 1 (at start): sc 6 in ring, so that you end up with 60sts in rnd 10. Divide into 3 sections, 20sts between each. Have 23 ch (or fewer) around bottom of hat.

OR:

Finish top circle at rnd 9, divide into sections of 21 sts. Have 24 ch (or fewer) at bottom of hat.

OR:

Use a smaller hook such as 4mm for main body of hat.


DSCF1066

 
Template by suckmylolly.com