This weekend, I went to see Matilda the Musical at the Cambridge Theatre in London with my family. It was my choice - I had heard that it had received lots of plaudits and when asked which musical we should see as a family (my family + my uncle, aunt and cousins) then I suggested Matilda. So I approached with some trepidation - I would feel responsible if it was dull, boring or 'unsuitable'.
Thankfully, it was none of those things. I loved the book by Roald Dahl as a child and identified strongly with the clever little girl who enjoyed reading books (mercifully, I didn't identify with the unappreciated, unwanted daughter aspect of the character). The musical really captured the spirit of the books - riotous fun and just a little subversive. Having entered the theatre not knowing any of the songs, I've been happily humming 'When I Grow Up' and 'Miracle' since we left. The set design is really imaginative - full of books, rising desks, swings and things to climb up, and had plenty to look at during the interval. If you can get to London, then go to see it! It really is good - as a group of adults, we thought that any children aged 8+ would love it. There are some loud bits, sudden flashing lights, cruel parents and a scary headteacher so younger children might not cope.
It's also Wovember, so my Google Reader has been filled with lots of pictures of sheep and woolen objects over the past week. Wovember was established last year to celebrate real wool and real sheep. Personally, I knit a lot with wool but wear little of it in bought garments (the jumper I'm wearing today is 60% cotton and 40% polyester). However, wool is so much more evocative and connected to the lives of real people and animals than polyester. As a knitter and crocheter, I'm a little more keyed in than the average person to the idea that different breeds of sheep make different types of wool for different purposes, but I can't tell you the last time that I actually touched a live sheep (I was probably 8 and at a Rare Breeds Farm) or really got up close to one. What I've really enjoyed from the Wovember posts is the opportunity to get closer (via the internet) to sheep and where my wool comes from.
Monday, 5 November 2012
Matilda and Wovember
Monday, 5 September 2011
Esmée in UK Terminology
I've converted the Esmée pattern into UK terminology (dc instead of sc, and tr instead of dc). It should be available to download alongside the US terminology pattern when you buy it on Ravelry. There weren't any drastic changes to the pattern aside from changing letters, but hopefully it will be easier for people who are fluent in UK terminology to understand! Please let me know if any parts are unclear, or if I accidentally left in a rogue 'sc' or changed some letters that shouldn't have been changed (eg dchematic rather than schematic!).

I'm not really working on any projects at the moment. I am awaiting some Quince and Co yarn from Loop, which I intend to make into some swatches to try and submit to various publications. However, most of my time is taken up with making notes for my Master's dissertation, which I am starting at the beginning of October.
Thursday, 18 August 2011
Esmée Relaunched
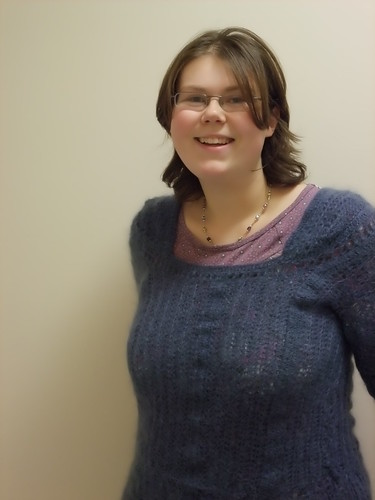
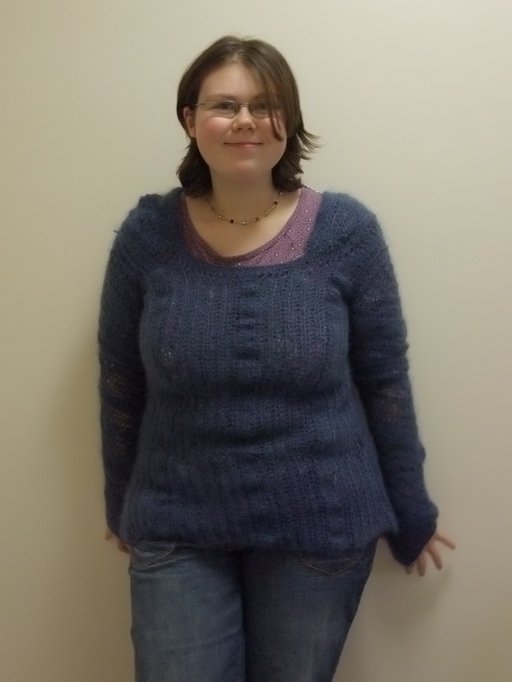
I've been a busy bee the last couple of weeks, rewriting Esmée and then formatting the pattern, drawing charts and a schematic, and getting photos. But it is finally done and released!
The blurb from Ravelry:
If you're wavering between buying the Inside Crochet version or this new Ravelry download version, then I'd urge you to buy this new pattern. Not just because I get the money from it, but because I've put a lot of work into making this a really good pattern, with lots of features that weren't/couldn't be featured in the Inside Crochet version for various reasons (space, style, I hadn't thought of them at the time). There are also various errata in the Inside Crochet pattern which, though I think I've now written out corrections for all of them on the Ravelry pattern page, do change the flow of the pattern. These errata are also all numerical - in that they represent places where the numbers of the pattern were off. If you think of a pattern as a giant formula for making a cardigan, these were places where the formula was broken - where the numbers given would not work with the cardigan as made. With the corrections, you have the right formula and then create the cardigan
But what I've endeavoured to do with the rewritten pattern is fix areas where the cardigan didn't fit properly. This isn't a numerical errata problem- the numbers were all right, but there are places where the back was a bit wide or the cardigan fell off the shoulders. These are things that I only discovered once people started making the cardigan, and I made my own version. When I was setting out to publish the pattern, I thought that it would be a waste just to republish a pattern that evidently didn't work on all sizes - problems that are minuscule on the Size 34in sample size are much larger on the bigger sizes - such as falling off shoulders etc.
So I went back to the very beginning. I made gauge swatches, I made lots of schematics based upon the Craft Yarn Council's Women's Size Charts and I wrote out all of the body instructions as based upon the numbers that I'd come up with for the schematics. Then I held my breath and crocheted a 42in sample - one that would fit me. And it fitted, all the problems that I'd had before - the back being too big, the shoulders falling off, seem to be solved. I then worked on a new sleeve cap and sleeve shaping design, and added those on. These seem to work too.
I then drew lots and lots of charts to try and explain the potentially confusing parts. As a visual crocheter, I rely a lot on charts and was somewhat disappointed that Inside Crochet didn't include the charts that I'd sent with the pattern (although they were a bit rubbish). All the charts in the Ravelry pattern are hand drawn - I decided to do this rather than doing them on the computer as it was easier both to do and to correct mistakes. As I go along, I always draw charts for the tricky bits (neckline shaping!) and so I'm very fluent in hand drawing charts. I found some good felt tips to draw them out and I think what I've drawn is very clear - in an ideal world, of course I'd like perfect, computer drawn charts. But I couldn't find a way to computer draw them without them looking very pixelly, and being difficult to resize.
Anyway, this version of the pattern should be a big improvement. The sample is truly a joy to wear - it's possibly the first crocheted cardigan that I've made for myself where I don't sit and mentally edit what I would change with it while I am wearing it.
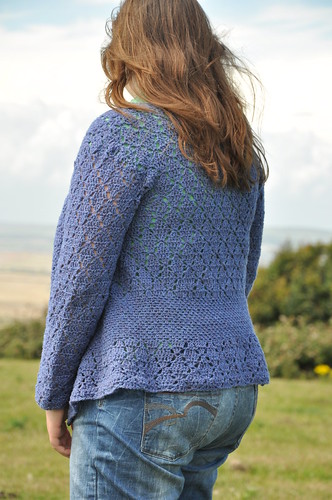
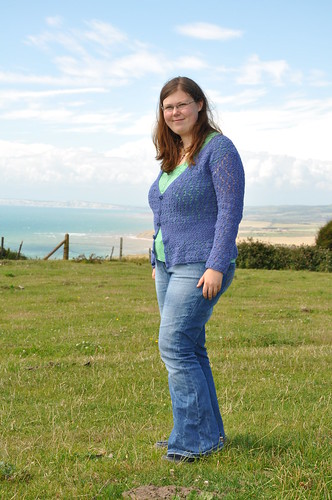
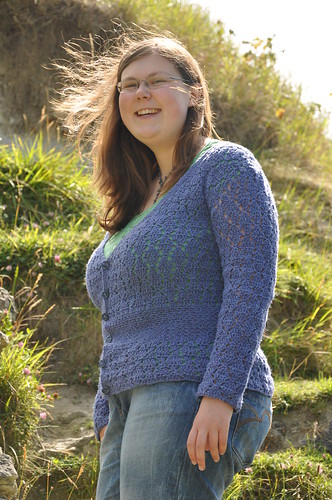
My Dad took the photos for me in the Isle of Wight. As you can see from the photos, it was very, very windy! In most of the photos, my hair looks awful, though my Mum was on hand with a brush every time it got too out of hand! It was a really beautiful location - near St Catherine's Oratory. There are lots more photos of the cardigan in a set I've made on Flickr.
I think that's all I want to say about the cardigan now! I'm planning a workbook/textbook/primer (?!) on crochet lace cardigans- how to fit crochet lace into schematics, working out how to decrease crochet lace, that sort of thing. I've also got quite a few stitch patterns that I want to work with to explain all this. But it's very intimidating (the idea of trying to teach and explain something rather than just write a pattern), and I'm not sure if I have time to do it. However, it is the sort of information that I would like to be out there and available, and well, someone's got to do it!

Tuesday, 21 June 2011
Swatches
I've finished my exams and am proceeding through the curious Cambridge experience known as May Week. May Week is a deceptive title, as it actually lasts about ten days and is in June. It's basically the week between everyone's exams finishing and having to go home, and is full of lavish May Balls, garden parties, lying in the sun (or rain, as it has been this week) and spending time with friends. We went to see Trinity May Ball's fireworks last night - which were sublime with fireworks, coloured fountains and balls of flame set to music, but also quite obscene in the amount of money they must have spent on it. Tonight we're planning to go and see St John's College's May Ball's (their 500 year anniversary May Ball, no less) fireworks. These fireworks are as close as we can get to the May Balls (tickets are expensive and nigh on impossible to get hold of) so we're hoping that they're going to be good.
Aside from firework watching, on the few spare moments, I've been trying to update and alter my Esmée pattern. Crocheting from the pattern for myself meant that I've identified many areas where I think it needs altering, and thus have decided to start from scratch. I've drawn schematics for each size, and am working from them to try and get the right sizing. But in some ways, this is a bit of a headache - I'm changing the neckline decreases, and this seems to require different instructions for each size and ack! I'm still plagued by doubt that I will get it wrong again, but, I know that lots of people responded positively to the look of the pattern, so I'd love to get the pattern itself right for when I can self-publish it.
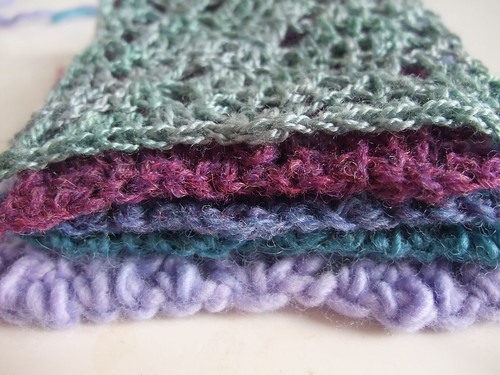
While I was revising however, I had put Esmée to the back of my mind, and my crocheting was focussed on the follow-on project for when I finish the Esmée pattern. I don't want to say too much about it now, but it has involved crocheting a lot of swatches.
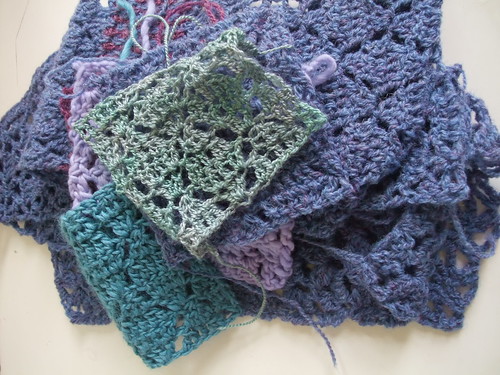
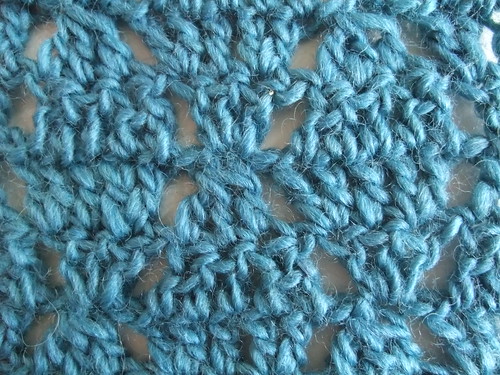
I'm quite excited about it - but I know that the hard work of getting the written Esmée pattern right has to be done before it. As blogging about 'ack! neckline decreases' is a little boring, I thought that I would just post up some pictures of swatches to amuse the eye. And as the weather finally appears fine, and I and my friends now have lots of free time, I intend to get photographs of Esmée 2 and my Ashfield Cardigan in a lovely location.
And to keep working on those neckline decreases.
Thursday, 9 June 2011
Flowers and finishing
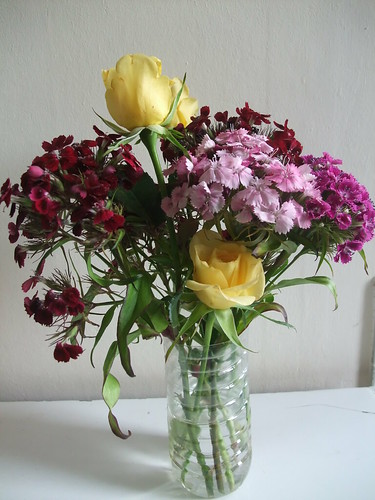
On Tuesday, my friend gave me some yellow roses for having completed half my exams. I, similarly, had given her flowers a week before for her own halfway point. The flowers I gave (nearly two weeks ago now), are Sweet Williams. They were 2 for 1, so I took half (the bunches were huge) and have survived and thus are now mixed with the roses in two makeshift vases in my room. I'm not sure if I would have bought yellow roses and pink and red Sweet Williams together, but they do look lovely.

In less than a week, I will have finished my exams and thus all the work for my degree. The prospect is both terrifying and exciting.
In the spirit of finishing things, today I finished my 'Zany' tunic.

It's based upon a design by Robyn Chachula that was in Inside Crochet number 2. I started it in August 2009, intending to make it as a tunic. I did most of the legwork then, but got distracted and bored and never finished it. My longest UFO - but as the yarn is Rowan Pure Wool DK - soft and luscious against the skin, I knew that it would be a waste never to make anything of it. Unfortunately, all the cut ends required to make the motifs meant that I couldn't unravel it. In April, as I was sorting out my project box to come back to uni, I pulled out the half finished tunic and looked at it, pulled it, and realised that if I unwound some of the motifs and rearranged them, then I could make a rectangular throw. I'm not really an afghan/blanket making person - but as this project was basically already done, I guessed that it wouldn't take me too long to rearrange the sleeve motifs into a rectangle. Except that I got distracted by Esmée 2 and the Ashfield Cardigan, and didn't actually get round to doing this until today.

It only took about two hours - one for reattaching the motifs, and another for sewing in all the ends that you can see in the first picture. It is now blocking on my bedroom floor - on the space between my bed and the chest of drawers. But I thought that I would post about it now, while I have the inclination and enthusiasm. Anyway, it's a project that I started after the summer of my first year of university, and have finished in the third and final year. Hooray for finishing!
Tuesday, 3 May 2011
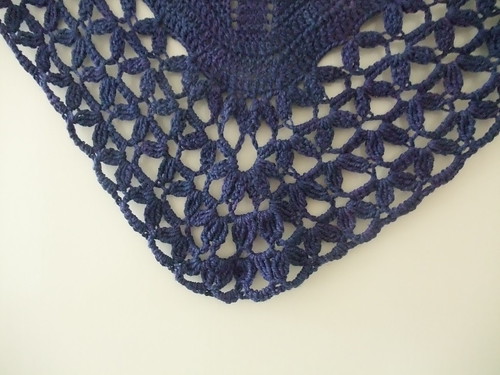
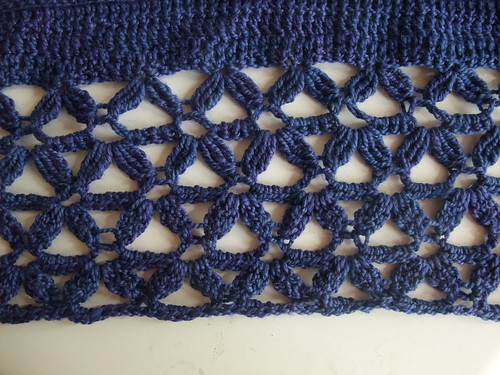
Endellion Shawl
This is a project on a Tuesday. Not a tool.
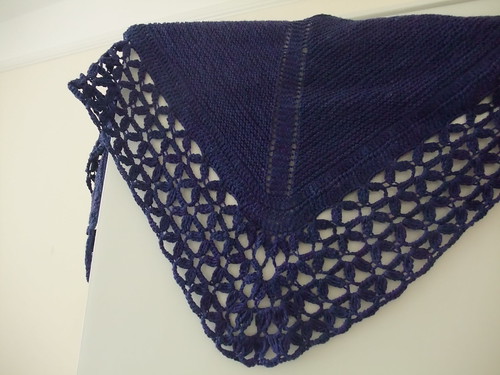
It was a struggle to photograph the entirety of the shawl, but hopefully you can build up a patchwork picture from the photos that I post. I took lots of photographs of the edging, because I think that it is quite beautiful, less of the garter stitch centre.
The Endellion shawl is a hybrid project - a garter stitch centre, based on the centre to the Multnomah Shawl by Kate Flagg, and then a crocheted flowery edging based upon the edging to the Midsummer Night's Shawl by Lisa Naskrent. It used one skein of Posh Yarn's Pamela in a colourway which I think was called 'Writing My Memoirs', but I'm not quite sure. Suffice to say it is dark blue, with 5% Stellina sparkle incorporated into the yarn. Initially, I was somewhat wary of a 'sparkly' yarn (they seem ubiquitous in UK indie dyers at the moment), but the sparkle isn't very obvious - it just gives it something a little magical when it catches the light, rather than looking like it has an obvious plastic strand in the yarn.
The intention with doing a hybrid knit-crochet project was to get the most out of both crafts - I wanted it to be densely stitched in the centre - hence the garter stitch, but lacy at the edge. I also wanted to take advantage of the low yardage and easier drape that you can achieve with dense stitches in knitting, so that there was more yarn left for the lacy crocheted flowers at the edge. I also wanted something slightly mindless at the beginning.
If you want to recreate the Endellion Shawl, then this is a rough guide: you'll need to knit the Multnomah centre until you have about 220 sts, then switch to looking at the Midsummer Night's pattern. I did three rows (because I hadn't got enough sts, but just do as many rows as you need to get the right number) of dc, adding increases at the centre like on the pattern (the chart is super helpful). Then I did Rows 5-7 of the edging twice, if you look atht the picture above, then you'll be able to see how I added extra increases at the centre.
This was a fun project- slightly mindless with all the garter stitch, but a great piece of problem solving to work out how to make the edging work. It also reminded me how awful I am at guessing how much yarn is left in a ball - I only did the edging once as I thought that I was about to run out, so I bound off. Then I realised that I had a sizable ball left so I decided to keep crocheting until I ran out - which was almost exactly after I'd done a whole repeat of Rows 5-7. Perfect!
Saturday, 5 March 2011
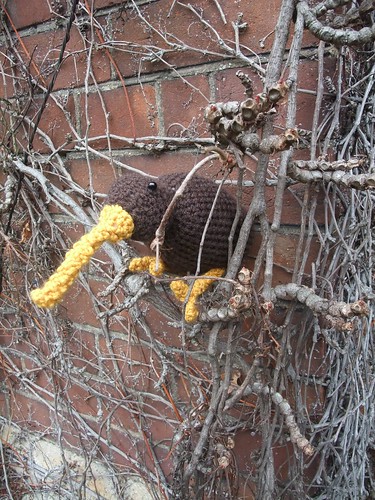
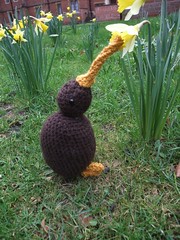
Kiwi Crochet Pattern
I agreed to crochet a kiwi (bird) for the college magazine, as kiwi is the magazine's mascot. I had to write out the pattern, so I thought that I would post it here as well. The head+body of my kiwi measures approximately 7in, but gauge is not particularly important.
Skills required:
Single crochet, single crochet 2 together, crochet in the round, magic ring, slip stitch, sewing


Monday, 14 June 2010
Crochet fashion and crochet patterns
Apparently, crochet is cool. At least, in the fickle world of fashion, it is getting a little more exposure than usual. Aside from my suspicion that a lot of clothes advertised as 'crochet' are not actually crocheted, and the concern about how if they are actually crocheted, how low the pay of the crocheters must be to produce a garment that sells for less than £30 as I am aware of the rudimentary mantra that 'crochet cannot be made by machine'. I am not going to go on such a rant, although be sure I will mention it to my friends if I notice them making crocheted clothes (after examining them to work out the stitch pattern), instead I am going to look at which patterns are available that conform to current shop-bought patterns, but have the satisfaction of being able to say 'I made it!'.
Sunday, 23 May 2010
Heidi Shawl
A flexible shawl, suitable for snuggling up on a cold winter's day, or covering the arms in the summer.
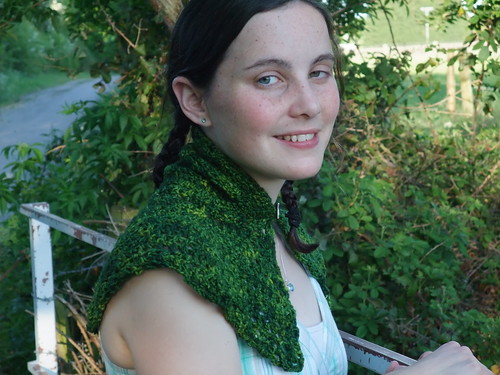 The example in the pictures was made under time-pressure, so acts as a small capelet or scarf, with the button anchoring the shawl in place. However, the pattern is expandable so that a larger shawl can be made, it could also act as a bolero if you sew up the underarms.
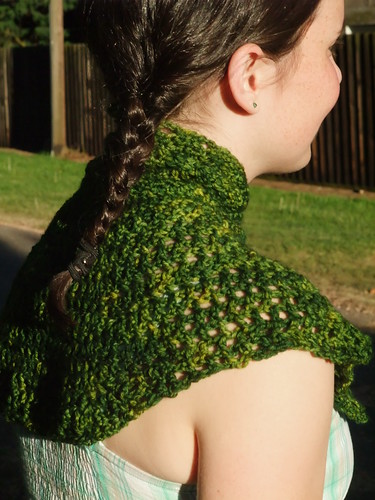
The shawl is made up of a dense stitch pattern at the top of the shawl, changing into a wider mesh pattern about halfway down.
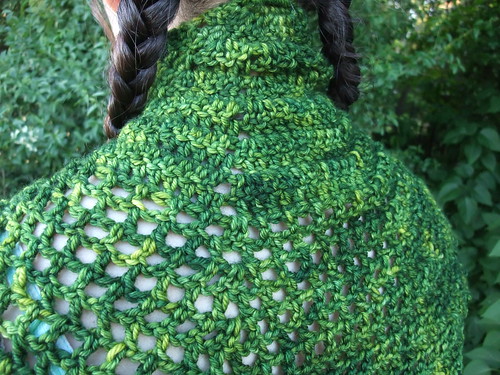

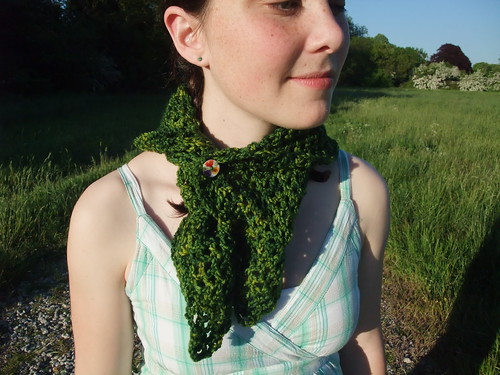
About 1 skein to 2 skeins of madelinetosh tosh DK in Jade (11wpi, 206 metres per skein). Pictured example used 1 skein.
5mm hook
Button
Needle to weave in ends and attach button
Pattern (uses US terms):
Special stitches:
Dc2tog: yarn over, insert in stitch, yarn over, pull over first loop, yarn over, pull through 2 loops on hook, yarn over, insert in next stitch, yarn over, pull over first loop, yarn over, pull through 2 loops on hook, yarn over, pull through all 3 loops on stitch.
The 3 ch at beginning of each round are counted as 1 stitch, as is each subsequent chain in pattern (so 3ch ch1 dc dc ch1 dc would be counted as 6 stitches). Chains in the first half of the pattern are counted as increases and should be stitched into in the next row (look at the loops from the previous row, not the stitches).
There are charts below the pattern for anyone who gets lost!
Dense pattern:
Row 1: magic loop, work 12 sc onto loop, and pull closed. Put finger in centre of loop so that it does not shut completely.
Row 2: 2 dc into first 6 stitches, turn leaving rest of stitches unworked (12 stitches)
Row 3: 3 ch, *ch1, dc into next 2 stitches*, repeat *to* 4 times, ch1, dc into last stitch, turn (18 stitches)
Row 4: 3 ch, *ch1, dc2tog, 2dc in chain space*, repeat *to* 4 times, ch 1, dc into last stitch, turn (23 stitches)
Row 5: 3 ch *ch1, dc into next 4 stitches*, repeat *to* 4 times, ch 1, dc into last stitch, turn (28 stitches)
Row 6: 3 ch, *ch1, dc, dc2tog, dc, 2dc in chain space* repeat *to* 4 times, ch 1, dc into last stitch, turn (33 stitches)
Row 7: 3ch, *ch1, dc in next 6 stitches*, repeat *to* 4 times, ch 1, dc into last stitch, turn (38 stitches)
Row 8: 3 ch, *ch1, dc in next 2 stitches, dc2tog, dc in next 2 stitches, 2dc in chain space* repeat *to* 4 times, ch 1, dc into last stitch, turn (43 stitches)
Row 9: 3 ch, *ch1, dc in next 8 stitches*, repeat *to* 4 times, ch 1, dc into last stitch, turn (48 stitches)
Row 10: 3ch, *ch1, dc in next 3 stitches, dc2tog, dc in next 3 stitches, 2dc in chain space*, *to* 4 times, ch 1, dc into last stitch, turn (53 stitches)
Continue this pattern of increases as long as desired, so that:
Even row: 3ch *ch1, dc in next (even number) stitches*, repeat *to* 4 times, ch1, dc into last stitch, turn (number8 stitches)
Odd row: 3 ch *ch1, dc in next (number of dcs in last odd row +1) stitches, dc2tog, dc in next (number of dcs in last odd row +1), 2dc in chain space*, repeat *to* 4 times, ch1, dc into last stitch, turn (number3 stitches)
Mesh pattern:
Row 1 (should come after an even row): 4ch,*dc, ch over next stitch* repeat *to* until reach ch space, 2dc in chain space, ch1, repeat this pattern until reach end. Do not do 2ch in final chain space but ch1 and then 1dc in last stitch, turn
Row 2: 4ch, *dc in top of previous row's dc, ch over previous row's chain* repeat *to* until reach previous row's 2dc increase – dc in first dc, ch1 and place marker over this stitch, dc in second dc, ch1, continue *to*, repeat until reach end, ch1, dc in last stitch, turn
Row 3: 4ch, *dc in top of previous row's dc, ch over previous row's chain* repeat *to* until reach marker placed in previous row – remove and 2dc in ch space, ch1, continue *to* and increases until reach end, ch1, dc in last stitch, turn.
Repeat rows 2 and 3 until desired length. There should be 4 places where increases are occurring.
Weave in ends. Sew button at the bottom of the dense pattern, or wherever is convenient for neck width.
Charts:
This chart shows the *to* units of the dense pattern. The arrows show the direction of working.

This chart shows the changeover from the dense pattern to the mesh pattern.


Thursday, 1 April 2010
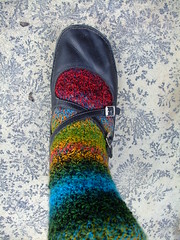
Adirondack Socks


Wednesday, 23 December 2009
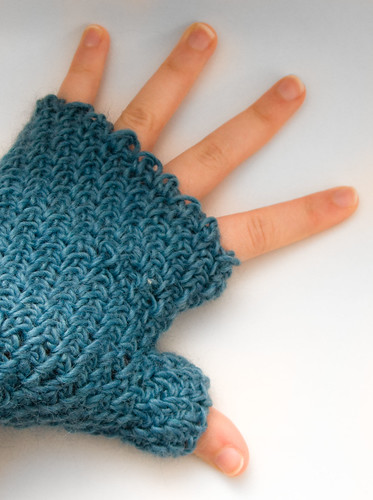
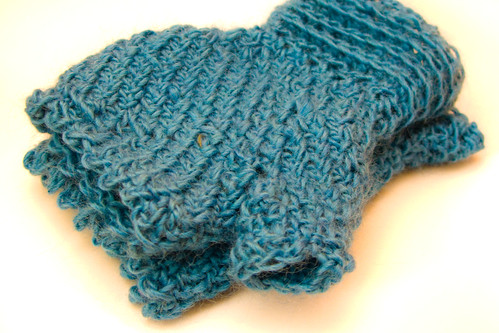
Skaði Fingerless Gloves

Thursday, 19 November 2009
Rapunzel again and the joy of having a finished object
Rapunzel has lain dormant in my cupboard since it was finished during the summer. It is now November. The problem was the sleeves. I tried to pull them up so that I would have something on my shoulders, which meant they were too tight, and fell down anyway. I thought the only way to fix it would be to rip the seams and make the shoulder part larger. Well, a few days ago, inspired by another Rapunzel FO, I decided it was time to pull my own Rapunzel out the cupboard and wear it to a lecture. Instead of trying to pull it into the shape Rapunzel is meant to be, with a U shape neck, I decided to wear it as a boat neck, with the sleeves falling off the shoulder. Perhaps it was months hanging up in the cupboard, but the sleeves fitted! Hooray! I realised that I didn't have to rip the seams at all, I could just add extra panels to make it fit the U neck that I wanted. So that's what I did, sewed up the seams on the arms which were quite loose, and then blocked it (wet blocked because I don't have a clue about blocking, so just dunked it in the sink and then pinned it to a towel). The sleeves were looser, it isn't a weird shape at the the top and it is so snug and cosy for winter, hurrah!
Thursday, 29 October 2009
Now which hook was I using...
Had a very exciting arrival of a lot of Mirasol Cotanani (as well as more Sirdar Peru for the dyeing experiments), which I am making into a yoked cardigan. The problem? I started the yoke, ran out of yarn, put it down with hook. Hook became unattached. I have now picked it up a week later and am trying to work out which hook I was using! I'm making it up as I go along, so don't have a handy pattern to check from. At the moment, I think I was using a 4.5mm - I remember thinking that the hook was smaller than last time I made a yoked cardigan...but I'm not sure. I've been working on various projects with a 5mm hook this week, so the 4.5 feels weird in my hands. I've worked and reworked the same row with different sized hooks, but I honestly cannot see a difference between the 4.5mm and 5mm...so am going with my instinct!

Sunday, 20 September 2009
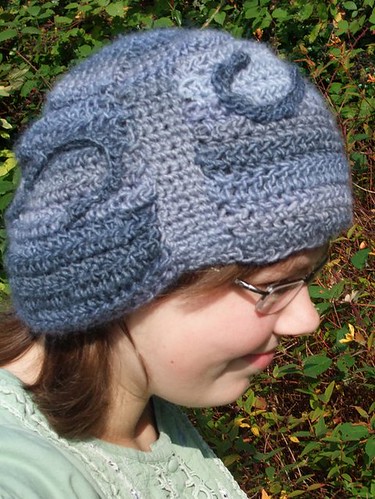
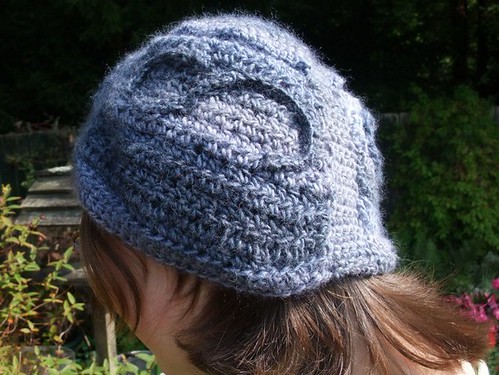
Londesborough Hat Pattern
*This is my first pattern, any problems, mistakes or difficulties you find with the pattern, please do not hesitate to ask or inform me*
This hat is inspired by the 8-9th century Irish Londesborough brooch. The hat comes up fairly large, so see the end of the pattern for some suggestions to make it smaller. The spirals are not an integral part of the hat, and do not have to be incorporated if not wanted.
NOTIONS:
1.5 skeins of Rowan Tapestry (approx. 180m/195yds) – this is a DK/8ply yarn, comes in 50g skeins
4.5mm and 3mm hook
Tapestry needle for weaving in ends
Pins (at least 5)
GAUGE:
Hdc: 4x4 in – 9 rowsx15sts
PATTERN:
With 4.5mm hook
Ch 3
Rnd 1: sc 7 in ring
2: *2sc in first sc, 1sc in next sc* repeat around (14 sts)
3: *2sc in first sc, 1 sc in next 2 sc* repeat around (21 sts)
4: *2sc in first sc, 1 sc in next 3 sc* repeat around (28 sts)
5: *2sc in first sc, 1 sc in next 4 sc* repeat around (35 sts)
6: *2sc in first sc, 1 sc in next 5 sc* repeat around (42 sts)
7: *2sc in first sc, 1 sc in next 6 sc* repeat around (49 sts)
8: *2sc in first sc, 1 sc in next 7 sc* repeat around (56 sts)
9: *2sc in first sc, 1 sc in next 8 sc* repeat around (63 sts)
10: *2sc in first sc, 1 sc in next 9 sc* repeat around (70 sts)
11: Use stitch markers to divide circle into three sections. Put stitch marker at beginning, at 23 sts and 46 sts (dividing into 23, 23, 22).
Section 1: From stitch marker, 5 sc in ea stitch, turn
Row 2-18: Ch1, 5 sc, turn
Bind off
Repeat for section 2 and 3, but do not bind off after section 3
Hat should look something like this:

Ch 25 from section 3 to 2, 5 sc in bottom of section 2, ch 25 from 2 to 1, 5 sc, ch 25 from 1 to 3, sc 25. Bind off.
Like so:

In panel A:
Row 1: 25 hdc in ea ch across, sl in edge, turn
2-5: 25 hdc in back 2 loops of ea hdc across, sl in edge, turn
6: extra sl in edge, 25 dc in ea hdc across, sl in edge, turn
7: hdc2tog, 23 hdc, sl in edge, turn (24 sts)
8: hdc2tog, 22 hdc, sl in edge, turn (23 sts)
9-17: 23 hdc in ea hdc across, sl in edge, turn
18: turn to wrong side, sl together edge of centre circle and panel A, bind off
Repeat for panels B & C
Spiral:
Take 3mm hook, attach to panel A, 3 hdc down from top, 7 hdc in from left hand side, ch 50, attach other end to 3 hdc up from dc line, 7 hdc in from right hand side.
Pin into spiral shape
Diagram:

Picture:
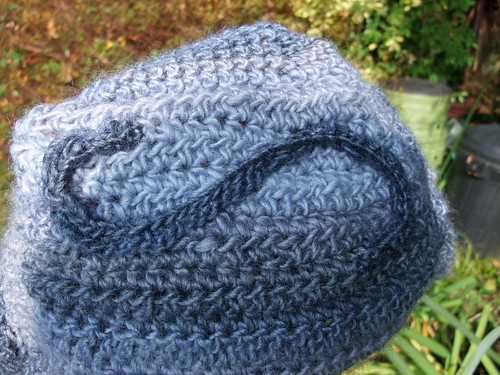
Sc 50 along spiral and into back fabric, bind off
Repeat for panel B & C
Suggestions for making a smaller size:
Add a band at the bottom of the hat, *hdc2tog, hdc in next 4 sts* around, sc when reaching each 5sc section.
OR
Rnd 1 (at start): sc 6 in ring, so that you end up with 60sts in rnd 10. Divide into 3 sections, 20sts between each. Have 23 ch (or fewer) around bottom of hat.
OR:
Finish top circle at rnd 9, divide into sections of 21 sts. Have 24 ch (or fewer) at bottom of hat.
OR:
Use a smaller hook such as 4mm for main body of hat.

Monday, 14 September 2009
A Belated Rapunzel
I have put off writing this for quite a while. This is also a project that needs explaining as it doesn't quite look like it is supposed to. The pattern - Rapunzel by Aoibhe Ni Shuilleabhain has more of a u-neck, and I haven't yet decided whether or not I am going to add the buttons and ribbon next.
The pictures were taken the day after I finished stitching it all up, so the fit isn't quite there yet. It has stretched a little since then, the 'boaterish' neck has become more u-shaped and the sleeves no longer dig into my arms.
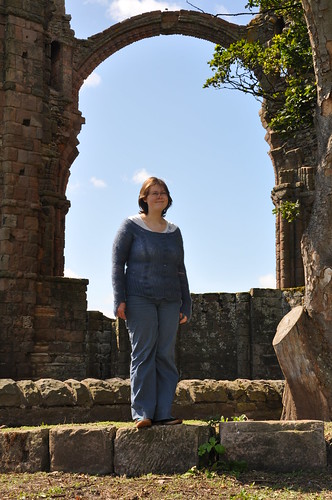
Did I mention Lindisfarne is radiantly beautiful? That arch is from the ruined medieval priory.
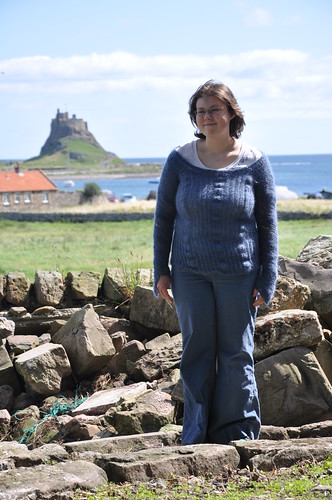
Lindisfarne Castle in the background. We walked there, but it was shut when we reached it :(

I am currently making a hooded cowl in Noro Silk Garden on circular needles (much fun) - I am very much in love with the colorway of Silk Garden - each rib has ended up a different colour, which is a wonderful effect. Indeed, I wish that Noro made skeins in the blue, pink and purple colours separately, as they are so rich, glorious colours (did I mention before that I tend to fall in love with colours rather than patterns or texture? Seriously, if it wasn't for this Silk Garden then knitting may have been abandoned once again).


